Import leads lists from my CRM into ZeroIn and validate email addresses
For now, ZeroIn has an option for a manual lead lists upload from any tool that you might be using – your CRM, your marketing or sales email tool.
To find out more either watch our video below, or read on for written instructions and illustrations:
Upload & Verify Email lists
1. Make sure your list is in .cvs or .xlsx format and that it contains the email addresses you want to check.
2. Go into any Campaign or create a new one. In the campaign page, hover over the Import icon and click on Import .xlsx/.csv.
We suggest creating a new campaign for the email clean up / re-verifications as to not mix in with other leads and other sources you might have.

Importing your existing leads
3. A pop-up window opens up and will prompt you to match the most important fields from your sheet with the fields in ZeroIn like Name, Last Name, Job Title, Company Name, domain of the website and the email address. You will have a preview of the data on the right-hand side of the matching field names.
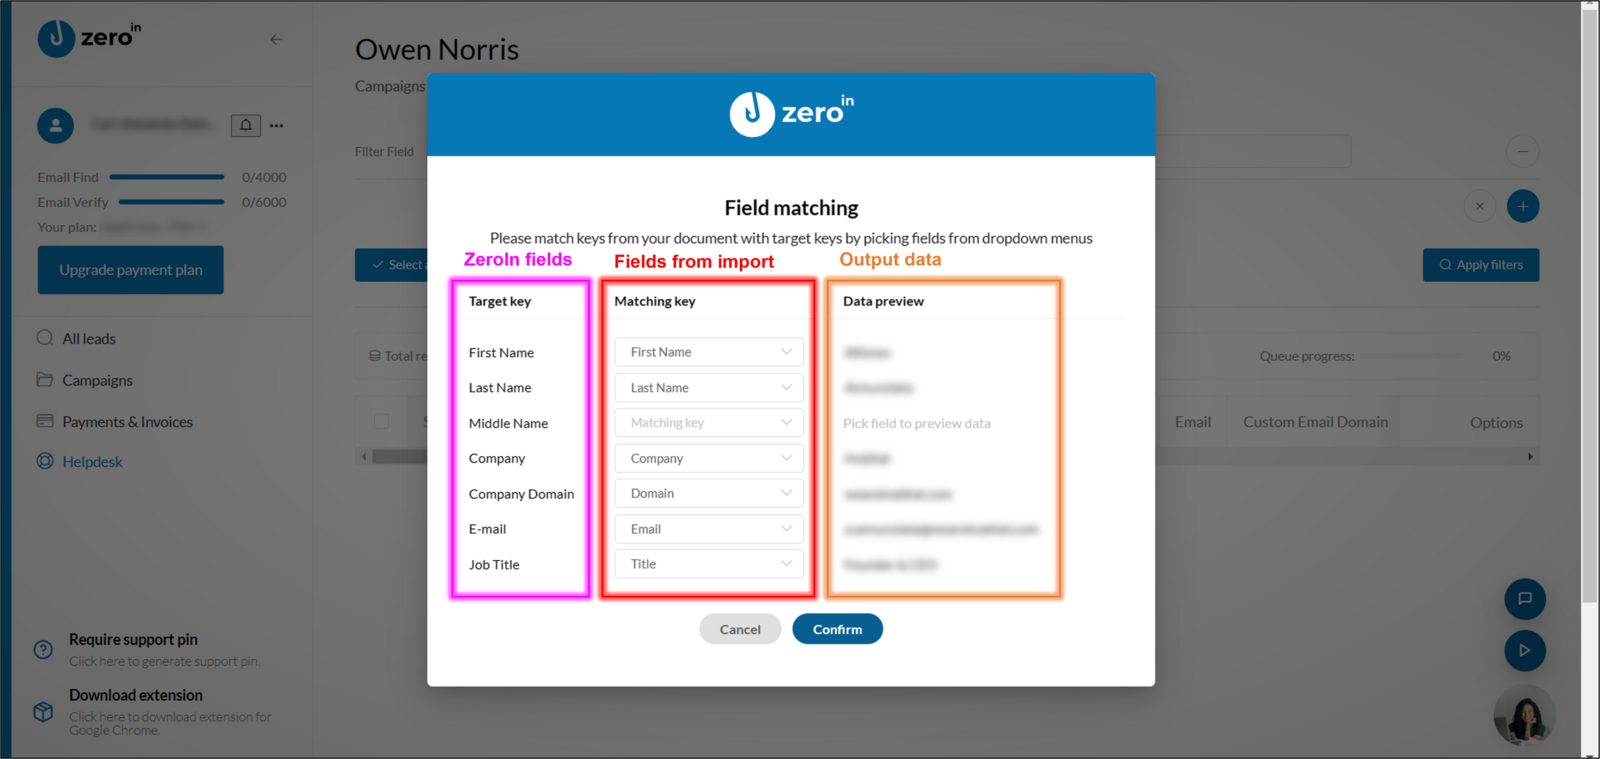
Matching fields when importing
Make sure you have AT LEAST ONE EMAIL ADDRESS listed in the file you are uploading.
4. Once imported the leads will appear in the campaign page, click Select all (or tick the leads of interest), hover over the Selected icon and click on Add to verify queue from the dropdown list.

Add to verify queue
5. Once the verification process is completed, you will see one of the following notifications next to the email address.
- Do not exist (invalid email)
- Verified | n% of validity – usually we list business emails with 100% accuracy. In rare cases you might see 80% accuracy indicator, meaning that the email has passed most of the verification steps but not all.
- Not found – meaning that email verification hasn’t resulted in a hard bounce (invalid email) but rather that this specific email server is not allowing the verification process to be completed.