Creating a list of companies to target as your LinkedIn audience might look like a long and boring job. First, you need to research your industry, then filter companies according to their location and maybe even by the number of employees…
It can get tough!
But what we’re about to show you will make turn the process into a breeze. We’re going to explain how you can build your LinkedIn audience in no time with ZeroIn — and all without spending a single ZeroIn credit!
If your team is already using ZeroIn to find emails for leads, you can take advantage of this tool, as a marketer, to create audiences much more quickly and precisely. Read on to find out how to get started!
1. Search and Fetch
Before you start building your LinkedIn audience, you need to have an ideal customer profile as well as a buyer persona in place. Let’s quickly create these elements before diving into the technical part of the process.
Start with ICP. Let’s say you want to sell your advertising services to automotive companies. They should be in the US and have at least 100 employees — you’re going straight for the big fish!
As for the buyer persona, you’re looking for marketing experts, so only managers and above will do.
Now that you have some idea of who you are looking for, let’s start your search!
Pro tip: you’ll be looking for people, rather than companies. This is for two reasons. First, LinkedIn doesn’t let you filter according to companies in the same precise way it lets you filter according to people. And secondly, even if it did, you would still have to add company names to your list manually. When you make your list people-driven, you’ll have much better control over your search, and later on, you’ll be able to simply export the names of your chosen companies. Once you’ve opted for the “People” category, in the upper right-hand corner you’ll see “All Filters.” When you open this, there are several filters to choose from, but the three most important ones are Industries, Locations, and Profile language.
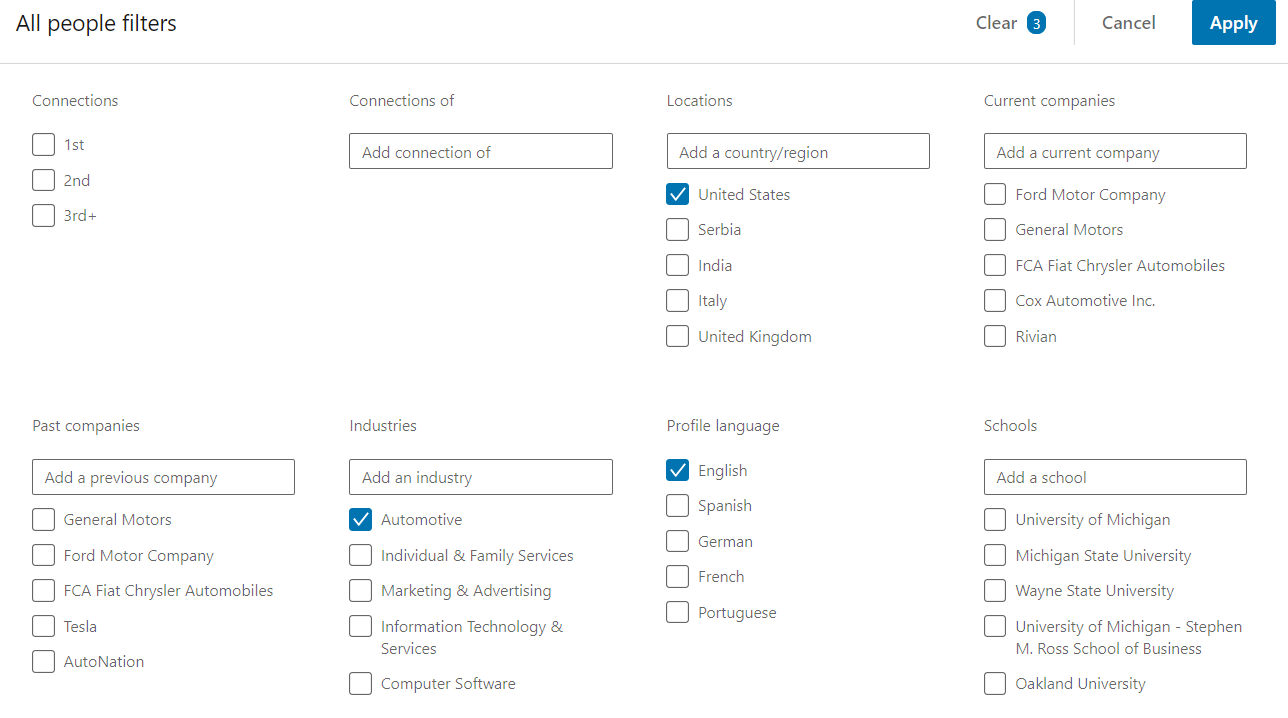
Based on the ICP you came up with, enter “Automotive” in the industries category. For locations and language, you’ll select the United States and English.
Now that you’ve added all the filters that can help you find the companies that best match your target audience, you’ll have a list of people who work for those companies. LinkedIn’s algorithm will list a lot of different companies, so you’ll rarely see people from the same company twice — which makes it easier to avoid duplicates in your final list.
No matter how many people you’ve found, you can put every one of them in the campaign you choose. That’s right — unlimited names. ZeroIn credits only count when you find or verify an email address. Anything that comes before that — even if it’s putting a thousand leads in a campaign — is perfectly free!
Now, your next step is opening the ZeroIn Chrome Extension.
After choosing your campaign or creating a new one, you can start fetching profiles from up to 10 pages of LinkedIn searches! And if you have more than 10 search pages you’d like to add, no worries. Simply fetch profiles from the first 10, then move on to page number 11 and repeat the process as many times as you need to. Just as with the last step, you won’t be spending a single credit!
Once you’re in the user portal, it’s time to do some light research. Though you can see 26 different pieces of information for every lead in the campaign, when it comes to the LinkedIn audiences and the ICP we opted for, you only need two: company and company info.
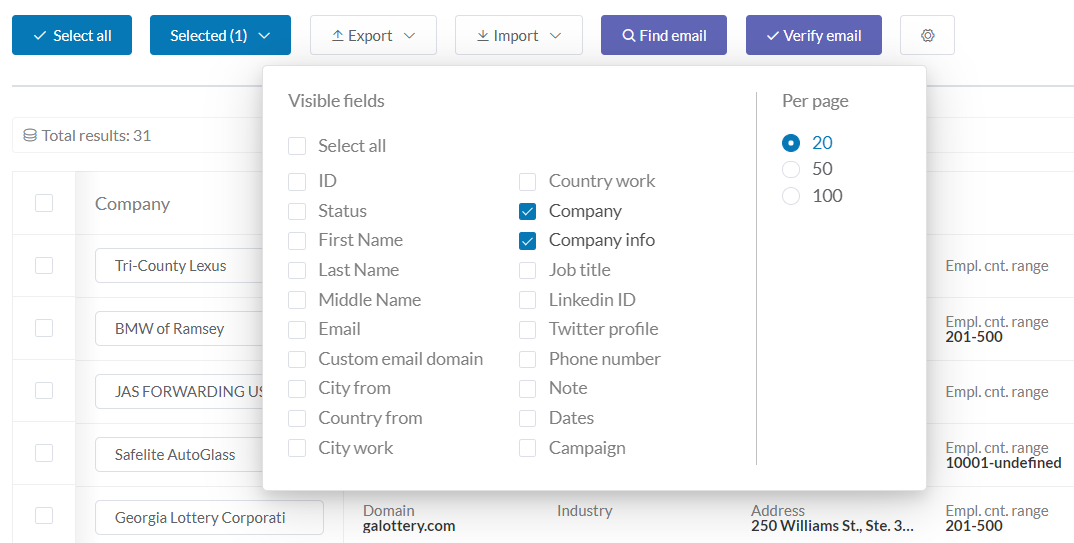
To get a better look, click to deselect all information, then simply select only the two you need. This will give you a much clearer look, and after identifying which companies simply don’t fit your ICP, you can either delete them completely or move them to another campaign to save for later.
2. Export as CSV
Once your list is ready it’s time to export it. Simply select all your leads, then click on “export” and then “download .csv.” This is the format you need, in order to turn your list into an uploadable LinkedIn audience.
You’ll notice, however, that what you’ve exported isn’t only those fields you selected, but all the fields ZeroIn could find. This was done to help you more easily find which of them are useful to you.
Simply delete the columns you don’t need and leave only the company name.
Important note: you don’t need to find websites for those companies, but the column still needs to be there, even if it’s empty! Otherwise, LinkedIn won’t recognize it as an account list and won’t be able to upload it. But having the names of the companies is more than enough, as this is an either/or type of situation. LinkedIn will find the employees associated with these companies either by the company name or by its website — but it doesn’t need both!
If you’re not feeling too sure about creating the account list on your own, you can also download it here and simply copy the company names. Either way, just make sure you export it as a .csv file!
3. Upload the account list
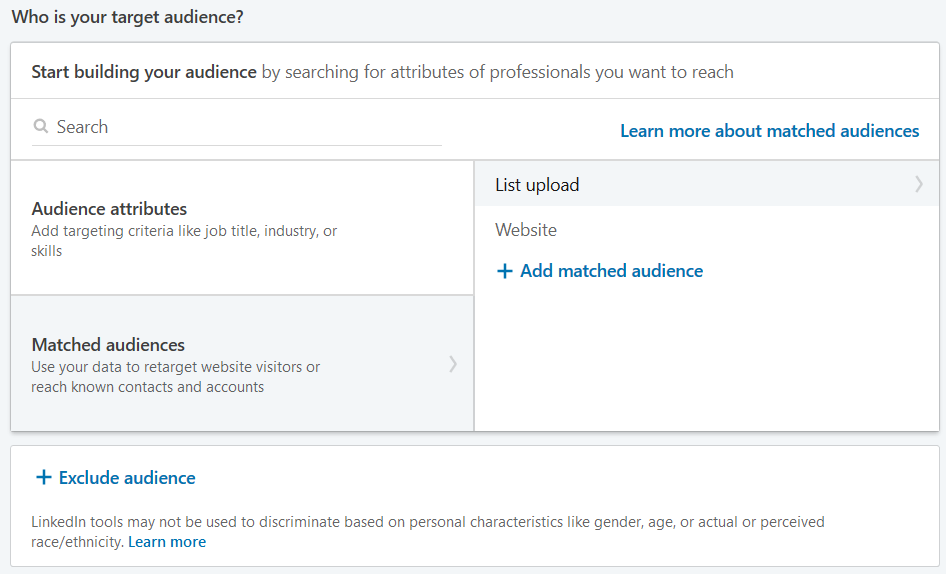
With your account list now ready, it’s time to upload it to the LinkedIn campaign manager. Under Account Assets, you’ll find Matched Audiences. When you click there, you’ll see all the audiences that have been uploaded so far. On the far right, click on “create an audience,” then “list upload.”
Then on the right side, you’ll see create an audience – list upload.
Once you upload the account list, LinkedIn will tell you if it’s good to go or if you need to change something about it. Maybe you forgot to add the column for the company website or perhaps you mistyped something. Make sure everything is correct before uploading it!
And now… we wait. It can take the LinkedIn algorithm up to 48 hours to build your audience. Once that’s done (and you’ll see the Status say “Ready” in green letters once it is), you can finally…
4. Create your campaign
This is the step where you’ll use your buyer persona to determine your campaign targeting parameters. The better your targeting, the better your money will be spent! The most important things to determine here are seniority and job functions, but let’s start from the beginning.
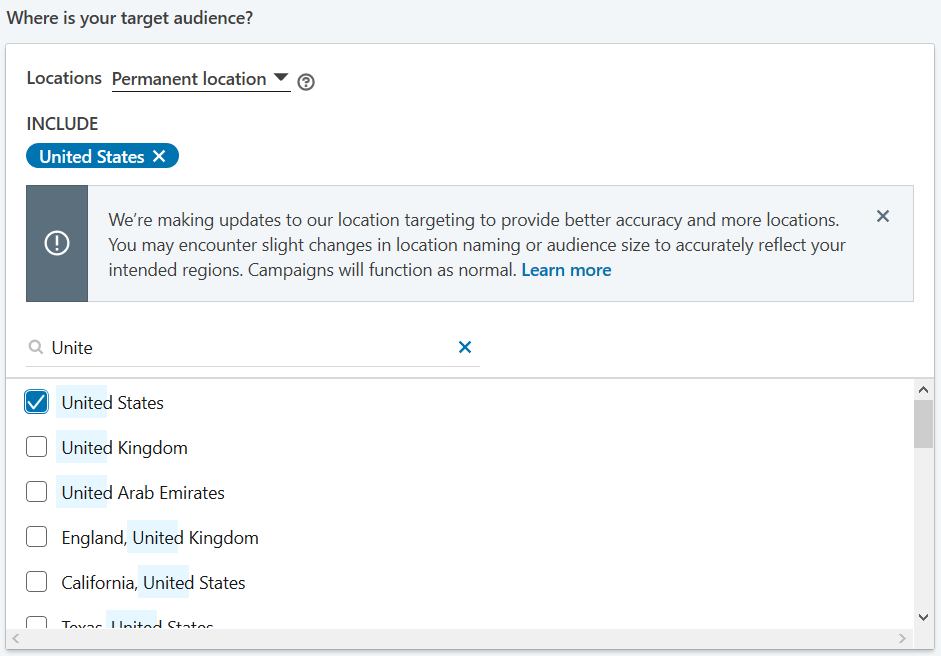
The first thing you’ll notice is that you need to add the location and profile language again. You may be wondering, “Why do I need to repeat myself here?” The simple answer is that your campaign won’t run unless you enter all the necessary info into these fields. You did find those companies based on those same parameters, but LinkedIn doesn’t know that! And besides, it’s only a couple of extra clicks.
Bonus advice: go for permanent rather than Recent + Permanent location. That way you’ll make sure you don’t catch someone who was traveling to the location you’re targeting!
Now that you’re ready to narrow the audience further, it’s time to select the list you’ve created. Simply go to Matched Audiences and choose “List upload.”
Handy tip: you can repeat the whole process if you want to exclude certain companies rather than target them. For example, you may want to exclude from your targeting the companies you’re already in business with — save that money for those who aren’t on board yet!
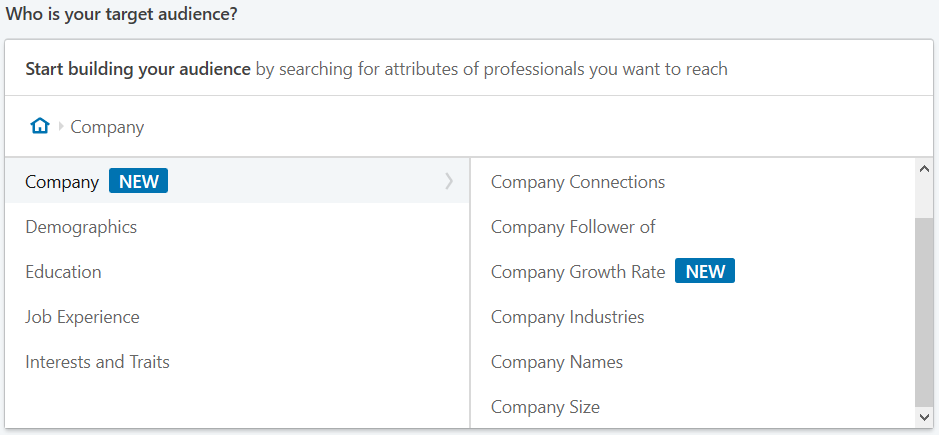
LinkedIn recently introduced some new targeting options that are pretty great for what we’re doing here, as they’re company related.
Under Audience attributes, then Company, you’ll find Company category and Company Growth Rate. These will allow you to narrow your search even further.
We’re finally arriving at the part of the process that’s relevant to your buyer persona — Job Experience. Here, you’ll need to select Job Functions and Job Seniorities. Based on your buyer persona, under functions, you would choose Marketing as well as Media and Communications.
As for seniority — since you’re looking for managers and higher, Director, CXO, VP, and Owner are good choices. Just make sure to have an AND between functions and seniorities, rather than OR — if you don’t pay attention to this, your targeting will be way off!
The only thing left to do now determines your budget and create your ads — and you’re ready to go. Tight lines!
If you’re planning on contacting your targeted audience directly rather than starting a campaign, you can use ZeroIn’s primary feature to find their email addresses or verify those you may already have. With a 98% accuracy, you don’t need to worry about ending up in SPAM or your emails bouncing!
Start creating targeted advertising lists with ZeroIn today by choosing one of our Pay-Once-use-forever plans.
Happy fishing!